A SHARP KNIFE IS A SAFE KNIFE
Keeping a sharp edge on your blade is important for your own safety. Compensating for a dull edge by applying additional force to finish a cut is where serious injuries can occur. If the knife blade is unexpectedly freed from what you are cutting, there is often an ongoing momentum that can slash you.
When you sharpen a Buck Knife properly, it will perform how it was meant to. Never sharpen your knife on a power-driven grinding wheel not specifically designed for that purpose. You could burn the temper from your blade, making the edge brittle and prone to chips or cracks. This also voids the warranty. The first step to knife sharpening is to pick a sharpener.
HOW TO SHARPEN YOUR KNIFE
Once you decide which type of sharpener is best for you, please check out the following instructions. If you are uncomfortable sharpening a blade yourself, we do offer Sharpening Services. Buck does not offer to sharpen serrated edges.
Sharpening is really two processes: Grinding and honing. Grinding is simply the removal of metal. Honing is a precision abrasion process in which a relatively small amount of material is removed from the surface by means of abrasive stones. Once you have the right shape, usually using a more aggressive grit, you then switch to a finer grit to hone the edge.
Buck Family Inside Tip
Al Buck (1910-1991) had a great trip using a felt pen for people struggling to master sharpening by hand. He would tell people there were only three things to remember when sharpening: " Always cut into the stone, never drag your knife edge back over the stone and always maintain your angle."
To use Al's method, take a black felt pen and shade in the knife’s bevel. Then take two strokes on the stone and examine the edge. If you have maintained the proper angle, then all the black will be gone. If you see black on the top of the edge, it means you are holding the back of the knife too far from the stone. If there is black on the bottom of the edge, but the top is clean, then you are laying the knife too flat on the stone, and you need to raise it a bit. Repaint the edge and try it again. Once you discover what the right angle looks like, then just maintain it.
Knife Sharpening
SHARPENING STRAIGHT, NON-SERRATED BLADES ON A STONE OR STEEL
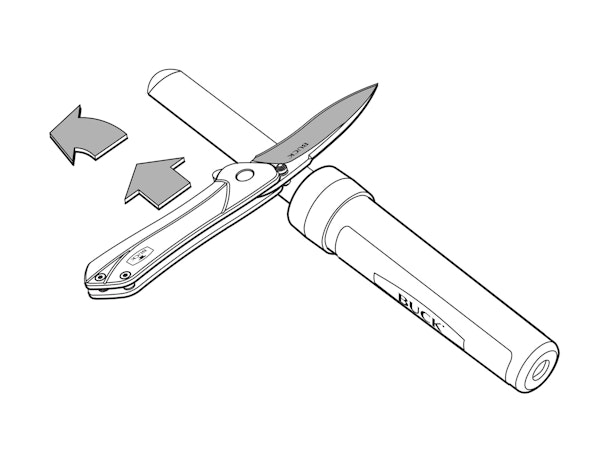
See Buck's line EdgeTek Sharpeners. You should inspect the condition of the blade by looking down the length of the edge. Look for nicks or flat spots that will reflect light.
· If the blade is nicked or extremely dull, start with Stage 1 (Use a Coarse Grit Stone).
· If the blade is only somewhat dull or just needs a touch-up, start with Stage 2 or Stage 3.
STAGE 1
HEAVY SHARPENING: FOR NICKED, INCONSISTENT EDGES OR EXTREMELY DULL BLADES. USE A COARSE GRIT SHARPENER
This stage is called the rough cut. To remove inconsistencies in the blade edge and take the edge from a round “U” to a strong “V,” begin with a coarse grit sharpener. Buck's EdgeTek steels or stones will do the trick, as well as the EdgeTek Honing Stone.
We recommend doing 5 strokes per side and then evaluating the grind you are creating and adjusting your angle or stroke as you deem necessary to get a consistent width bevel on both sides.

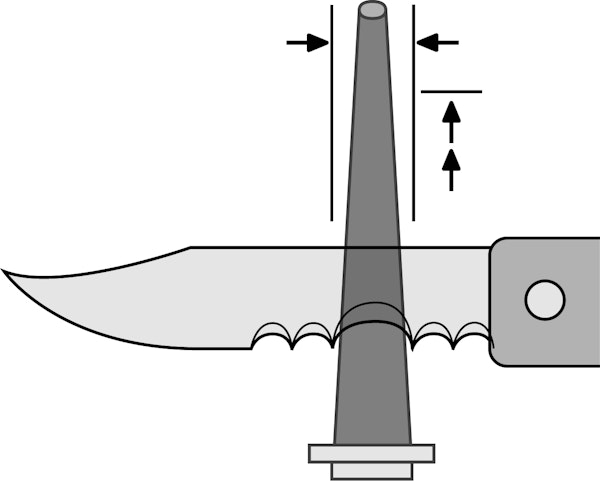
Hold the Correct Grind Angle (Fig. 1, 1a)
Ideally, you want to follow the same grind and edge angle (the bevel) as when the blade was new. The angle on a Buck Knife is set based on how we feel the knife will be used. Heavy use needs a strong and blunt “V,” while skinning or filleting would need a deeper but more vulnerable “V.” We tend to grind to 13-16 degrees per side (see illustrations). If you match the existing edge angle and hold the knife against the stone to cut evenly across the edge grind, you will produce an edge with a similar angle.
A good rule of thumb is to hold the blade so the back of it is about one blade width up from flat on the stone.
Stroke the Blade Across the Sharpener with Even Control (Fig. 2, 3)
Too much pressure can crush or remove the grit from a diamond sharpener and will fatigue the user. It can also force deeper micro serrations on the edge, which are harder to remove in a subsequent process and can even break off the burr, creating new flat spots on the edge.
Your stroke can be straight or circular, from “hilt to tip” OR “tip to the hilt” whichever is more comfortable. If you're using a small portable sharpener, stroke the blade in nearly a straight direction. Remember to always cut into the stone and never pull or drag your edge backward. The blade edge should face in the same direction as your stroke. So, you're essentially moving the metal away from the edge. We recommend the circular stroke as it helps you maintain your angle instead of having to find it every time you lift the knife from the stone.
Maintain Contact with the Sharpener
As you work the length of the edge (from hilt to tip), do not let the tip of the blade skip off the end of the sharpener. This can cause a rounded tip or long sharpening scratches across the blade.
Alternate Blade Sides Equally
Do the same number of strokes on each side of the blade. We recommend 5 strokes per side and evaluate, but if you do 15-20 strokes on one side, do 15-20 on the other side. Don't alternate sides with each stroke, as it is more difficult to maintain your angle or find a burr.
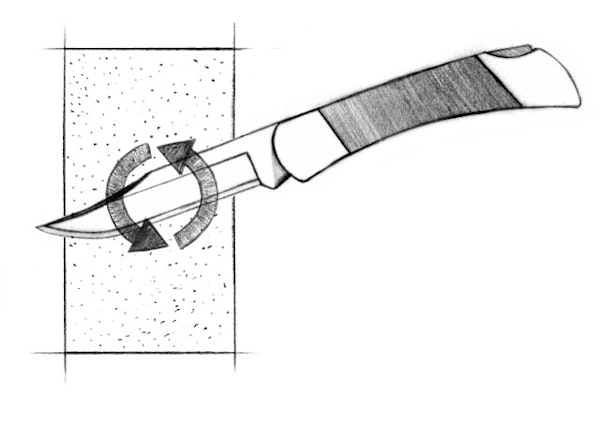
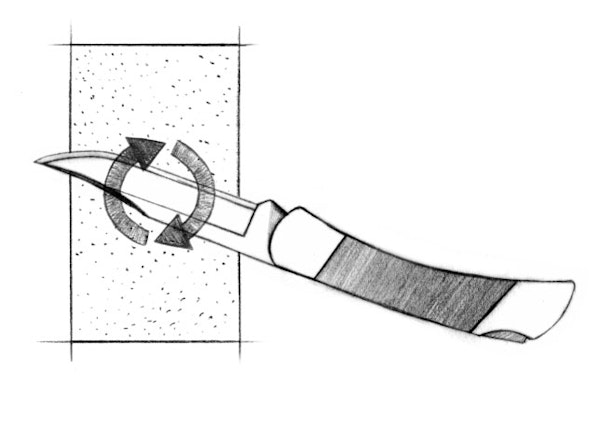
Circular Sharpening (Fig. 4, 4a)
This method is perfectly valid and aids in holding a consistent angle. Keep the blade on the surface and use an easy, clockwise motion with the edge facing right, until the desired sharpness is achieved. It is ideal for achieving the original factory edge.
Turn the blade over. Use an easy, counter-clockwise motion with the edge facing left. Try to spend the same amount of time on each side and evaluate.
Work the “Nicks” Separately
If there is a small nick on the edge, work the area around the nick evenly, side-to-side. Once the nick is gone, return to working the entire edge length. If there is a large nick on the edge that does not interfere with your work, you may want to prolong the life of your knife and leave the nick.
A final process inspection is to run the knife over a fingernail lightly (and we stress lightly). If your sharpening has made it to the edge, you will feel the micro serrations catching. If you are not done, the unsharpened sections of your edge will slide with no drag.
Inspect the “Evenness” of Your Edge
You should have an even edge angle “bevel” on both sides.
Once you feel a consistent drag from hilt to tip, move on to Stage 2.
STAGE 2
MEDIUM TO FINAL SHARPENING: FOR DULL BLADES, QUICK TOUCH-UPS, AND FINAL SHARPENING. USE A MEDIUM GRIT SHARPENER
If you have just completed Stage 1, pat or wipe your knife dry. Be careful-the burr can cut just like a sharpened edge. Now you're ready to work the edge.
To simply sharpen dull blades and remove rough scratches, begin here.
Sharpeners
Diamond Sharpeners can be used dry or wet. Use water or water-based honing fluid, not petroleum-based oil, as a lubricant. Natural Sharpening Stones can also be used dry or wet, but we recommend wet. Use water, water-based honing fluid, or petroleum-based honing oil.
Sharpen the edge, following the same steps as in Stage 1
You can achieve a good, sharp edge and finish at this stage without going on to Stage 3. Hone with light, single strokes, side-to-side, until you feel no burr on either side. To fine-tune the edge or smooth “sharpening scratches,” skip this step and go directly to Stage 3.
STAGE 3
FINE SHARPENING FOR A SHAVING EDGE
FINAL SHARPENING = NATURAL STONE OR FINE GRIT SHARPENER
Stage 3 removes any remaining burr and puts a burnish on the blade edge.
Using sharpening fluid
Natural Sharpening Stones should be used wet. Sharpening will require some clean up, so be generous with the honing fluid.
Use the same stroking motion as described in Stage 1. Repeat until scratches from the previous grit stone are gone. You should still feel a burr, but it should be smaller and finer.
Use light, single strokes side-to-side. Make one stroke from the hilt to the tip, then turn the knife to the other side and stroke once from the hilt to the tip. Repeat until there is no burr. This will finally set the edge.
Repeat Several Times
You shouldn't feel any micro serrations on the edge, from hilt to tip. The knife should be razor-sharp at this point. If the knife fails to cut as expected, you may need to return to Stage 2. And remember, don't apply too much pressure.
SERRATED BLADES
Serrated blades hold their cutting ability long after a straight-edged blade will go dull; however, they are much more difficult to sharpen. A flat stone or steel will grind off your serrations; therefore, we recommend tapered or cylindrical fine diamond steel or ceramic for this job. Each separate serration much be sharpened individually.
Serrated blades have a grind on one side of the blade. Only sharpen the grind side of the blade. Hold the sharpener at the angle that matches the original edge angle. Hold the knife with the edge away from you and the serrated side of the edge facing up. Set the tapered diamond sharpener in a serration so that you fill the indentation. Draw the sharpener towards the edge.
The goal of sharpening a serration is to maintain the ramp of the serration right to the edge. You do not want to create an edge bevel. Therefore we once again recommend the trusty felt pen trick. Paint the serration to be sharpened and follow your process. Evaluate if you are removing all the black. It should take at most 5-8 strokes to resharpen if your angle was correct. Rotate or spin the sharpener as you go for the most even, consistent sharpening.
Recreating the original edge on a serrated knife is difficult, even if you use a tapered sharpener. But you can expect to get a serviceable edge. A serrated blade is more easily distorted through sharpening than a straight blade edge. So, don't sharpen unless dull spots are truly visible.
GUT HOOKS
While very similar in process to a serrated blade, a gut hook is ground on both sides of the blade. Use a Diamond Taper Sharpener or a Diamond Pocket Sharpener. Both are excellent tools for sharpening gut hooks.
Do not try to fill the entire width of the gut hook with the wide end of the sharpener. This will enlarge the gut hook curve and distort the cutting edge.
Put the pointed, narrow end of the sharpener up against the open end of the gut hook. The narrow, pointed end of the sharpener should face in toward the thickness of the blade, away from the edge of the gut hook. Match the angle of the sharpener to the original edge angle. This will maintain the correct sharpening angle and prevent you from getting cut by the blade tip. Hold the same angle when sharpening each side of the gut hook.
Rotate. In a forward and sideways motion, stroke the sharpener from one side of the gut hook to the other. Spin the sharpener as you go. As with sharpening a blade edge, the objective is to start at the edge and stroke away from the edge.
Don't overdo It. Restrain from over-sharpening or putting too much pressure on the tool. Alternate sides and check your progress often.